In this tutorial we will be developing a Spring Boot Application that makes use of JWT authentication for securing an exposed REST API.
What is JSON Web Token?
According to jwt.io
JWT (JSON Web Token) is an open standard (RFC 7519) that defines a compact and self-contained way for securely transmitting information between parties as a JSON object. This information can be verified and trusted because it is digitally signed. JWTs can be signed using a secret (with the HMAC algorithm) or a public/private key pair using RSA.
Many applications use JSON Web Tokens (JWT) to allow the client to indicate its identity for further exchange after authentication. This token is created during authentication (is provided in case of successful authentication) and is verified by the server before any processing.
How do JSON Web Tokens work?
In authentication, when the user successfully logs in using their credentials, a JSON Web Token will be returned and must be saved locally (typically in local storage, but cookies can be also used), instead of the traditional approach of creating a session in the server and returning a cookie. Whenever the user wants to access a protected route or resource, the user agent should send the JWT, typically in the Authorization header using the Bearer schema. The content of the header should look like the following:
Authorization: Bearer <token>
A JSON Web Token consists of three parts separated by dots (.), which are:
- Header
- Payload
- Signature
Therefore, a JWT typically looks like the following:
xxxxx.yyyyy.zzzzz
For better understanding we will be developing the project in stages:
- Develop a Spring Boot Application to expose a Simple REST GET API with mapping
/v4/hello. - Configure Spring Security for JWT.
- Expose REST GET API with mapping
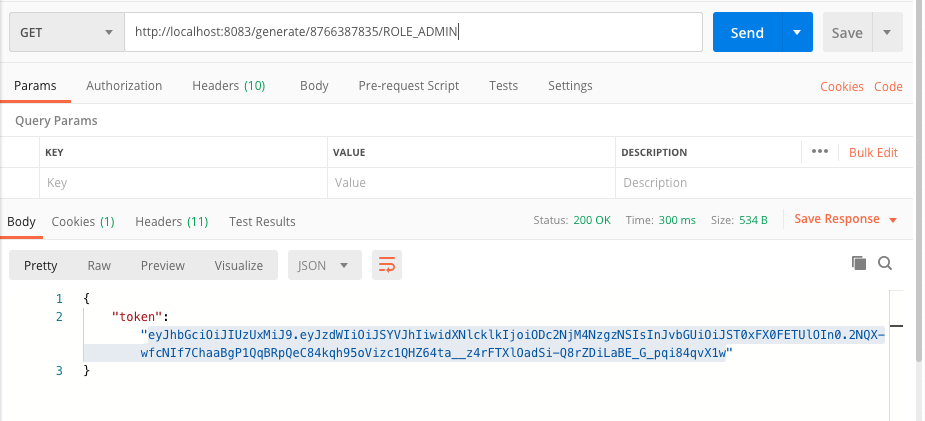
/generate/{mobileNo}/{role}using which User will get a valid JSON Web Token and then allow the user access to the api/v4/helloonly if it has a valid token
Setting up a basic demo project
1. Creating a Spring Boot application
First, we will create a new Maven project. After that, we’ll create a Controller class for exposing a GET REST API as follows. Now, Create the bootstrap class with SpringBoot Annotation.
Compile and the run the JwtApplication.java as a Java application.
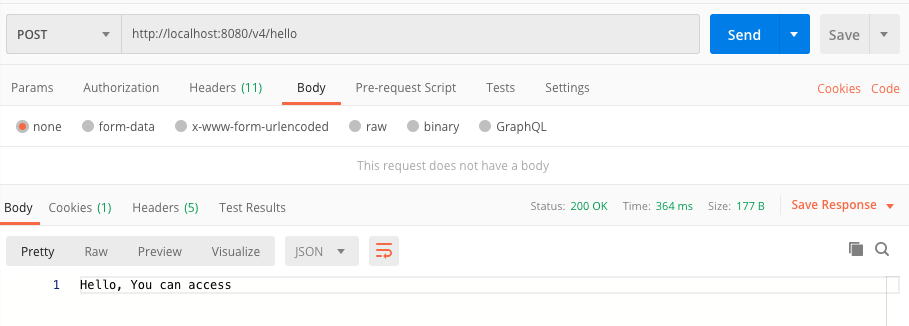
Go to localhost:8080/v4/hello.
You will get this response: “Hello, You can access”.
2. Spring Security and JWT Configuration
We will be configuring Spring Security and JWT for performing 2 operations-
-
Generating JWT - Expose a POST API with mapping
/authenticate. On passing correct username and password it will generate a JSON Web Token(JWT). -
Validating JWT - If user tries to access GET API with mapping
/hello. It will allow access only if request has a valid JSON Web Token(JWT).
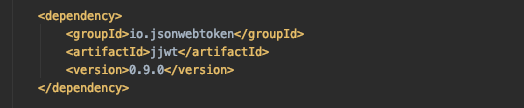
First, we will add the JWT dependancy in the pom.xml.
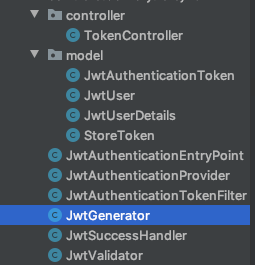
 The project structure will look like this:
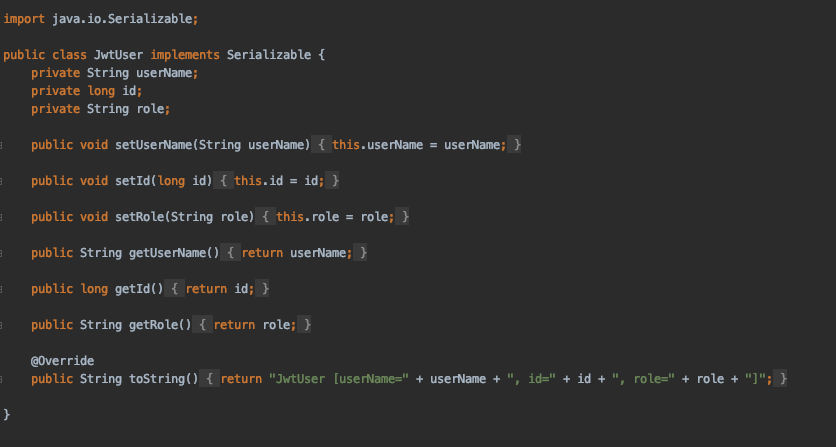
JWTUser.java class allows new users to register themselves.
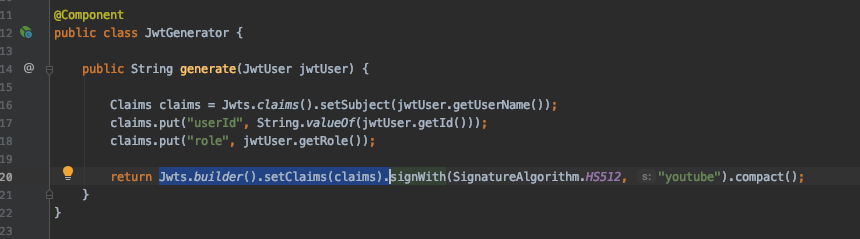
Generating JWT
Because of JJWT’s fluent interface, the creation of the JWT is basically a three-step process:
- The definition of the internal claims of the token, like Issuer, Subject, Expiration, and ID.
- The cryptographic signing of the JWT (making it a JWS).
- The compaction of the JWT to a URL-safe string, according to the JWT Compact Serialisation rules.
The final JWT will be a three-part base64-encoded string, signed with the specified signature algorithm, and using the provided key. After this point, the token is ready to be shared with the another party.
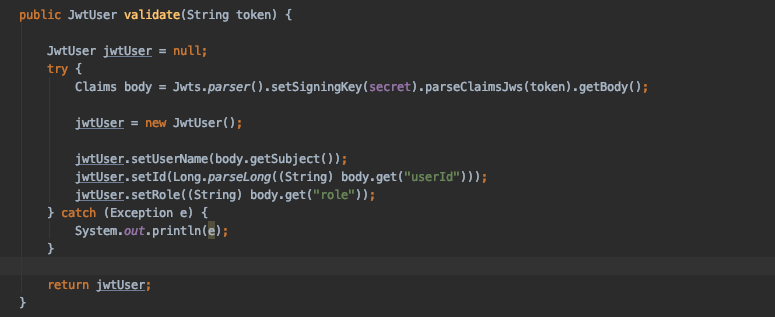
Validating JWT
For validating JWT, we’ll use a parser for reading JWT strings, used to convert them into a JWT object representing the expanded JWT.
See the image below:
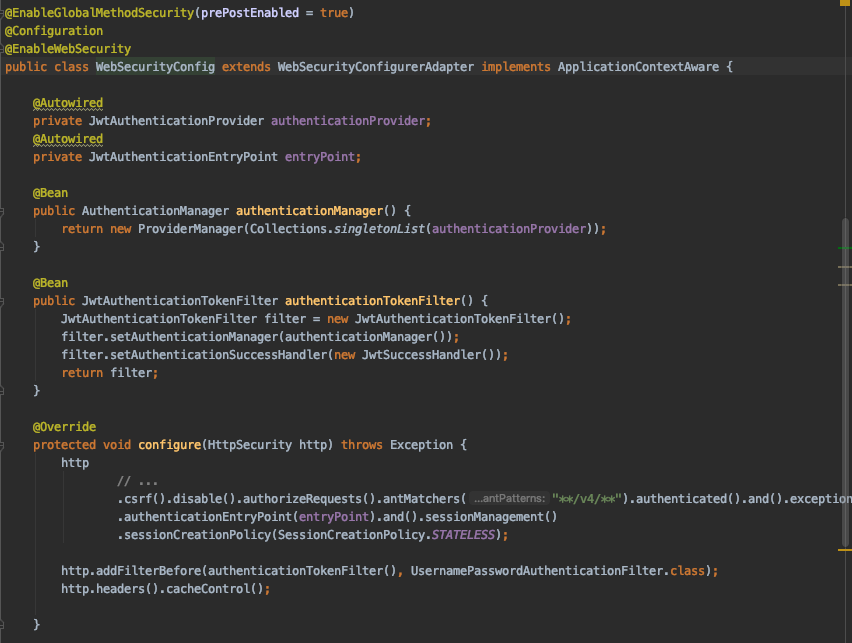
WebSecurityConfig
The WebSecurityConfig class extends WebSecurityConfigurerAdapter to provide custom security configuration.
Following beans are configured and instantiated in this class:
- JwtTokenFilter
- PasswordEncoder
Also, inside WebSecurityConfig#configure(HttpSecurity http) method we’ll configure patterns to define protected/unprotected API endpoints.
Here, we have configure the API endpoint pattern as ( **/v4/** ). So, now our /v4/hello API is protected.
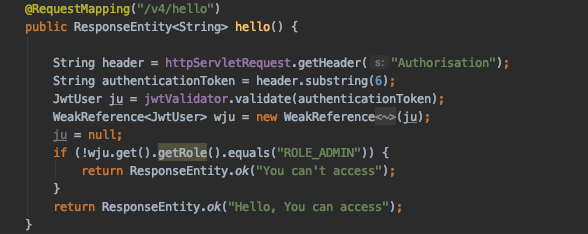
We’ll run the application. First we will generate the access token.
Now, try to access the api endpoint using the token.
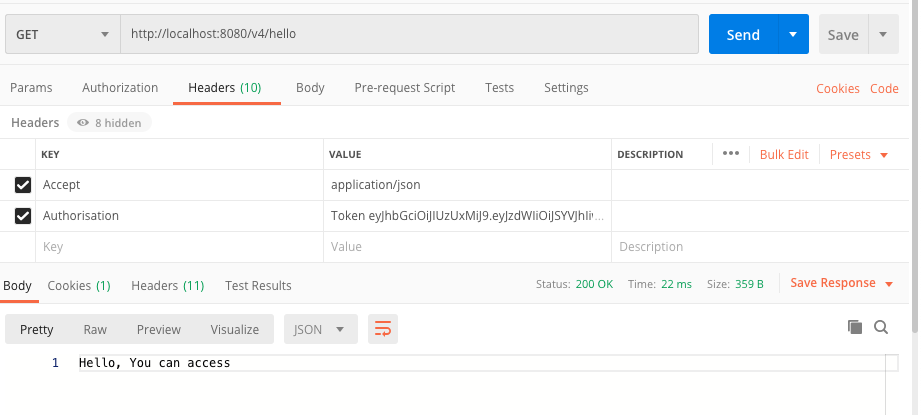 As you can see, we are able to access the API with the token.
Conclusion
Thanks to Spring Boot and Spring Security, we can have a JWT authentication service up and running in record time.
